Thursday, November 30, 2006
Monday, November 27, 2006
To Do List
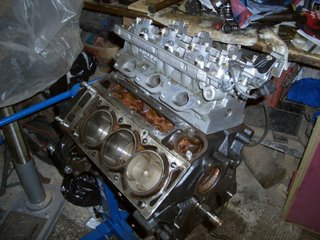
Another day another head. Got the second head on yesterday and torqued it down. It's getting close to where I need the 2.5 to swap bits over.
Today I fitted the blanking plate and hylomared it into place. Torqued it to the same torque as the old plate, but I'm not sure if it's going to be enough. I'll give it a little more tomorrow - neither part is alloy (one mild steel and the other is the cast block), so it'll be fine.
MY TO-DO LIST:
Oil pump on - need to find out if the gasket is the correct one, as there seems to be a hole that in the block that is blanked off with the gasket, and a corresponding one in the pump.
Change Crank Oil Seal - a LOT easier this time as it's on the stand and i don't have to become a contortionist under the car.
Find which in inlet and which is outlet for oil - need this for the oil cooler
Water Bridge In Head - fit
Everything else i need from the other engine:
Sump
Remove heads
Get the inlet cams and put on exhaust of 3 litre
Engine out
swap - alternator, startet, dispack,cam covers, sump, pickup pipe, fit new power steering pump, ancilliary bits too
Fit the lsd that i'm going to part with 480 quid for. That should make things fun.
Saturday, November 25, 2006
Rings and things
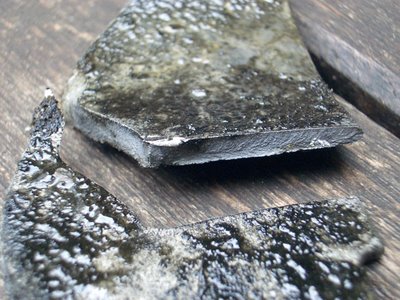
Here's the ring I broke. There's a lip on it, must have been half in and stick on the lip and my 'gentle' tapping took it off.

Close up of the ring.

South Wales pistons gave me a dodgy set to start - had two top rings and none of the middle one with the step. Had to go back, but the piston is in now.
Had a bit of spare time after putting new big end bolts on and torqueing them down
So I put the front head on and torqued it. It's tight - 25Nm+90degrees+90degrees+90degrees+15degrees. Me arms still hurting.

Close up of the ring.

South Wales pistons gave me a dodgy set to start - had two top rings and none of the middle one with the step. Had to go back, but the piston is in now.

Had a bit of spare time after putting new big end bolts on and torqueing them down
So I put the front head on and torqued it. It's tight - 25Nm+90degrees+90degrees+90degrees+15degrees. Me arms still hurting.

Wednesday, November 22, 2006
Oops
Well, the plate came yesterday so I fabricated up the piece, fits perfick. Hammerited it cos it's mild steel and will rust over time if not coated.
Started to put the piston in - AT LAST!! This is number 5 in - got them all in - was putting number 2 in and i split an effin ring!!! Bugger!! To pee'd off to take a pic, but take my word that I took a shaving off the lip of the ring.

Called the trusty South Wales Piston man and there's a set on the shelf - 11.47 plus vat. Go get it tomorrow and try not to chip this one. :(
Started to put the piston in - AT LAST!! This is number 5 in - got them all in - was putting number 2 in and i split an effin ring!!! Bugger!! To pee'd off to take a pic, but take my word that I took a shaving off the lip of the ring.

Called the trusty South Wales Piston man and there's a set on the shelf - 11.47 plus vat. Go get it tomorrow and try not to chip this one. :(
Sunday, November 19, 2006
Not much done today
Waiting for the steel plate so i can see if it seals properly before I put the heads on. Going to route a groove around the edge of the plate so some sealant will stay in there giving a better seal. Just in case.
Test fitted the adaptors into the oil inlet/outlets - no probs, but noticed a ridge inside the adaptors that might weaken the oil pressure. Drilled it out to be smooth all the way through.
Thats about it. Covered it with a plastic bag 'till I get the plate tomorrow. Says the weather is going to be peeing down until friday, so i'll be working on the 3 litre, not taking the 2.5 apart.
Block head
Was hoping to get the heads on today but missed a part - not my fault as i thought i had the raw materials to hand
Anyroadup - here's so far:
Here's a valve oil seal - you need one for every valve. They aren't hard to put on, but can be a bit of a bugger to get off, almost ruined a guide trying to pull them off until i found out to TWIST first. They get stuck on with either the heat making the rubber/whetever stick to the guides, or it's all the old oil coating them with a varnish and sticking them there. I'm for the second option - my dad (who worked on merlins and stuff) votes for one.

Here's how to put them on without damaging them
10mm socket. Easy.

2nd head half done - lifters are in on the inlet side

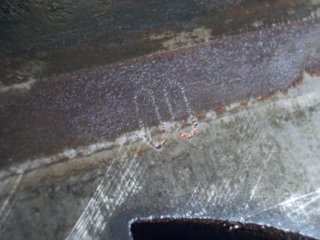
oh yes - thats what it says on the block.

cleaned the block up. Doesn't look that bad - was going to paint it with black hammerite, but I think it looks ok as is.

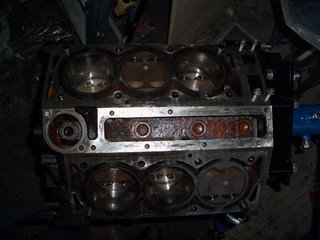
Top view of the block. That hole in the middle of the block is going to be plated off - it's where the original oil cooler went, but seeing as i've spent lots of money on rerouting it - it's not going back. This plate is what I'm waiting for to continue - i need to know if it's sealing before i put the heads on.

If you look on the picture above - on the top of the bores there is a bit that joins it to the block. Just to the right of that - thats where you find the cylinder sizes - from here you get you're appropriate sized rings.
Mine are 00 - standard sized.
Anyroadup - here's so far:
Here's a valve oil seal - you need one for every valve. They aren't hard to put on, but can be a bit of a bugger to get off, almost ruined a guide trying to pull them off until i found out to TWIST first. They get stuck on with either the heat making the rubber/whetever stick to the guides, or it's all the old oil coating them with a varnish and sticking them there. I'm for the second option - my dad (who worked on merlins and stuff) votes for one.

Here's how to put them on without damaging them
10mm socket. Easy.

2nd head half done - lifters are in on the inlet side

oh yes - thats what it says on the block.

cleaned the block up. Doesn't look that bad - was going to paint it with black hammerite, but I think it looks ok as is.

Top view of the block. That hole in the middle of the block is going to be plated off - it's where the original oil cooler went, but seeing as i've spent lots of money on rerouting it - it's not going back. This plate is what I'm waiting for to continue - i need to know if it's sealing before i put the heads on.

If you look on the picture above - on the top of the bores there is a bit that joins it to the block. Just to the right of that - thats where you find the cylinder sizes - from here you get you're appropriate sized rings.
Mine are 00 - standard sized.

Wednesday, November 15, 2006
Why do I grind in the valves?
Here's some better close-ups of the valves before and after:
As the valves get pitted they loose efficiency (let gasses past when they shouldn't)
This is an exhaust valve - you can see what 140,000 miles of opening and closing on hot gasses has done to it. This is probably the worst one in the engine.

Here's it's valve seat - same sort of pitting.

After some grinding this is the valve (it looks worse than it is, it's quite clean when you look at it!)

Here the ground seat on the bottom and an unground one on top.

As the valves get pitted they loose efficiency (let gasses past when they shouldn't)
This is an exhaust valve - you can see what 140,000 miles of opening and closing on hot gasses has done to it. This is probably the worst one in the engine.

Here's it's valve seat - same sort of pitting.

After some grinding this is the valve (it looks worse than it is, it's quite clean when you look at it!)

Here the ground seat on the bottom and an unground one on top.

Sunday, November 12, 2006
Headwork!
Yep - been working on the head today:

Here's one being ground (well - with one had while i take the pic with the other)

Here is a valve ready to go in - been ground so there's no pits in the seat or the valve.(sorry about the quality - cameraphone)

All 4 valves in this cylinder. Remembered to mark them all up and put them all back in the right order :)

One head is ready to go on. Just the other one (an hours grinding and an hours cleaning). Then deglaze the bores and everything can go together.

Here's one being ground (well - with one had while i take the pic with the other)

Here is a valve ready to go in - been ground so there's no pits in the seat or the valve.(sorry about the quality - cameraphone)

All 4 valves in this cylinder. Remembered to mark them all up and put them all back in the right order :)

One head is ready to go on. Just the other one (an hours grinding and an hours cleaning). Then deglaze the bores and everything can go together.
Thursday, November 09, 2006
New Oil Cooler Stuff
i'm moving the oil cooler(heat exchanger) from out of between the heads, and I'm turning it into an oil/air cooler.
This is the thermostat that will stop oil going to the cooler if it's less than 80 degrees C (which is operating temp for the engine). This should help get the engine up to temp quicker.

Here's my fancy new guage - oil pressure on top (should be a min of 1.2 bar - 17.4psi). It will go up to around 3 - 3.5 bar at top pressure. Oil temp on the bottom - i need to keep an eye on that to see it doesn't get to high (or low). If it does the new system will have to be redesigned/scrapped.

This is the thermostat that will stop oil going to the cooler if it's less than 80 degrees C (which is operating temp for the engine). This should help get the engine up to temp quicker.

Here's my fancy new guage - oil pressure on top (should be a min of 1.2 bar - 17.4psi). It will go up to around 3 - 3.5 bar at top pressure. Oil temp on the bottom - i need to keep an eye on that to see it doesn't get to high (or low). If it does the new system will have to be redesigned/scrapped.

Piston broke
Well, not really. Just stripped them down and they need a decent clean.

These are new oil ring on the left and old one on the right. The new one is a 2 part ring (apparently better) old one is a 3 part.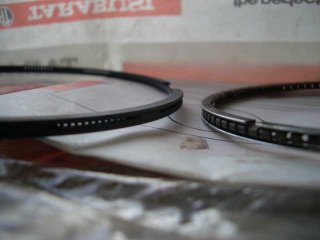
You can see the ring I've started to clean is the oil ring - THE most important ring there, if this doesn't move, then you'll start to burn oil. Most of the time when you're burning oil due to the rings it's because this has got gunked up and jammed in the groove.


These are new oil ring on the left and old one on the right. The new one is a 2 part ring (apparently better) old one is a 3 part.

You can see the ring I've started to clean is the oil ring - THE most important ring there, if this doesn't move, then you'll start to burn oil. Most of the time when you're burning oil due to the rings it's because this has got gunked up and jammed in the groove.


